Capturing the perfect passport photo can be a little tricky for anyone, but when it comes to seniors, there are some unique considerations to keep in mind. Aging can bring changes in skin tone, wrinkles, and facial features, which means lighting, expression, and posture become even more important. In this guide, we’ll walk you step by step through the best practices for taking a flattering, compliant passport photo for seniors.
Understanding Passport Photo Requirements for Seniors
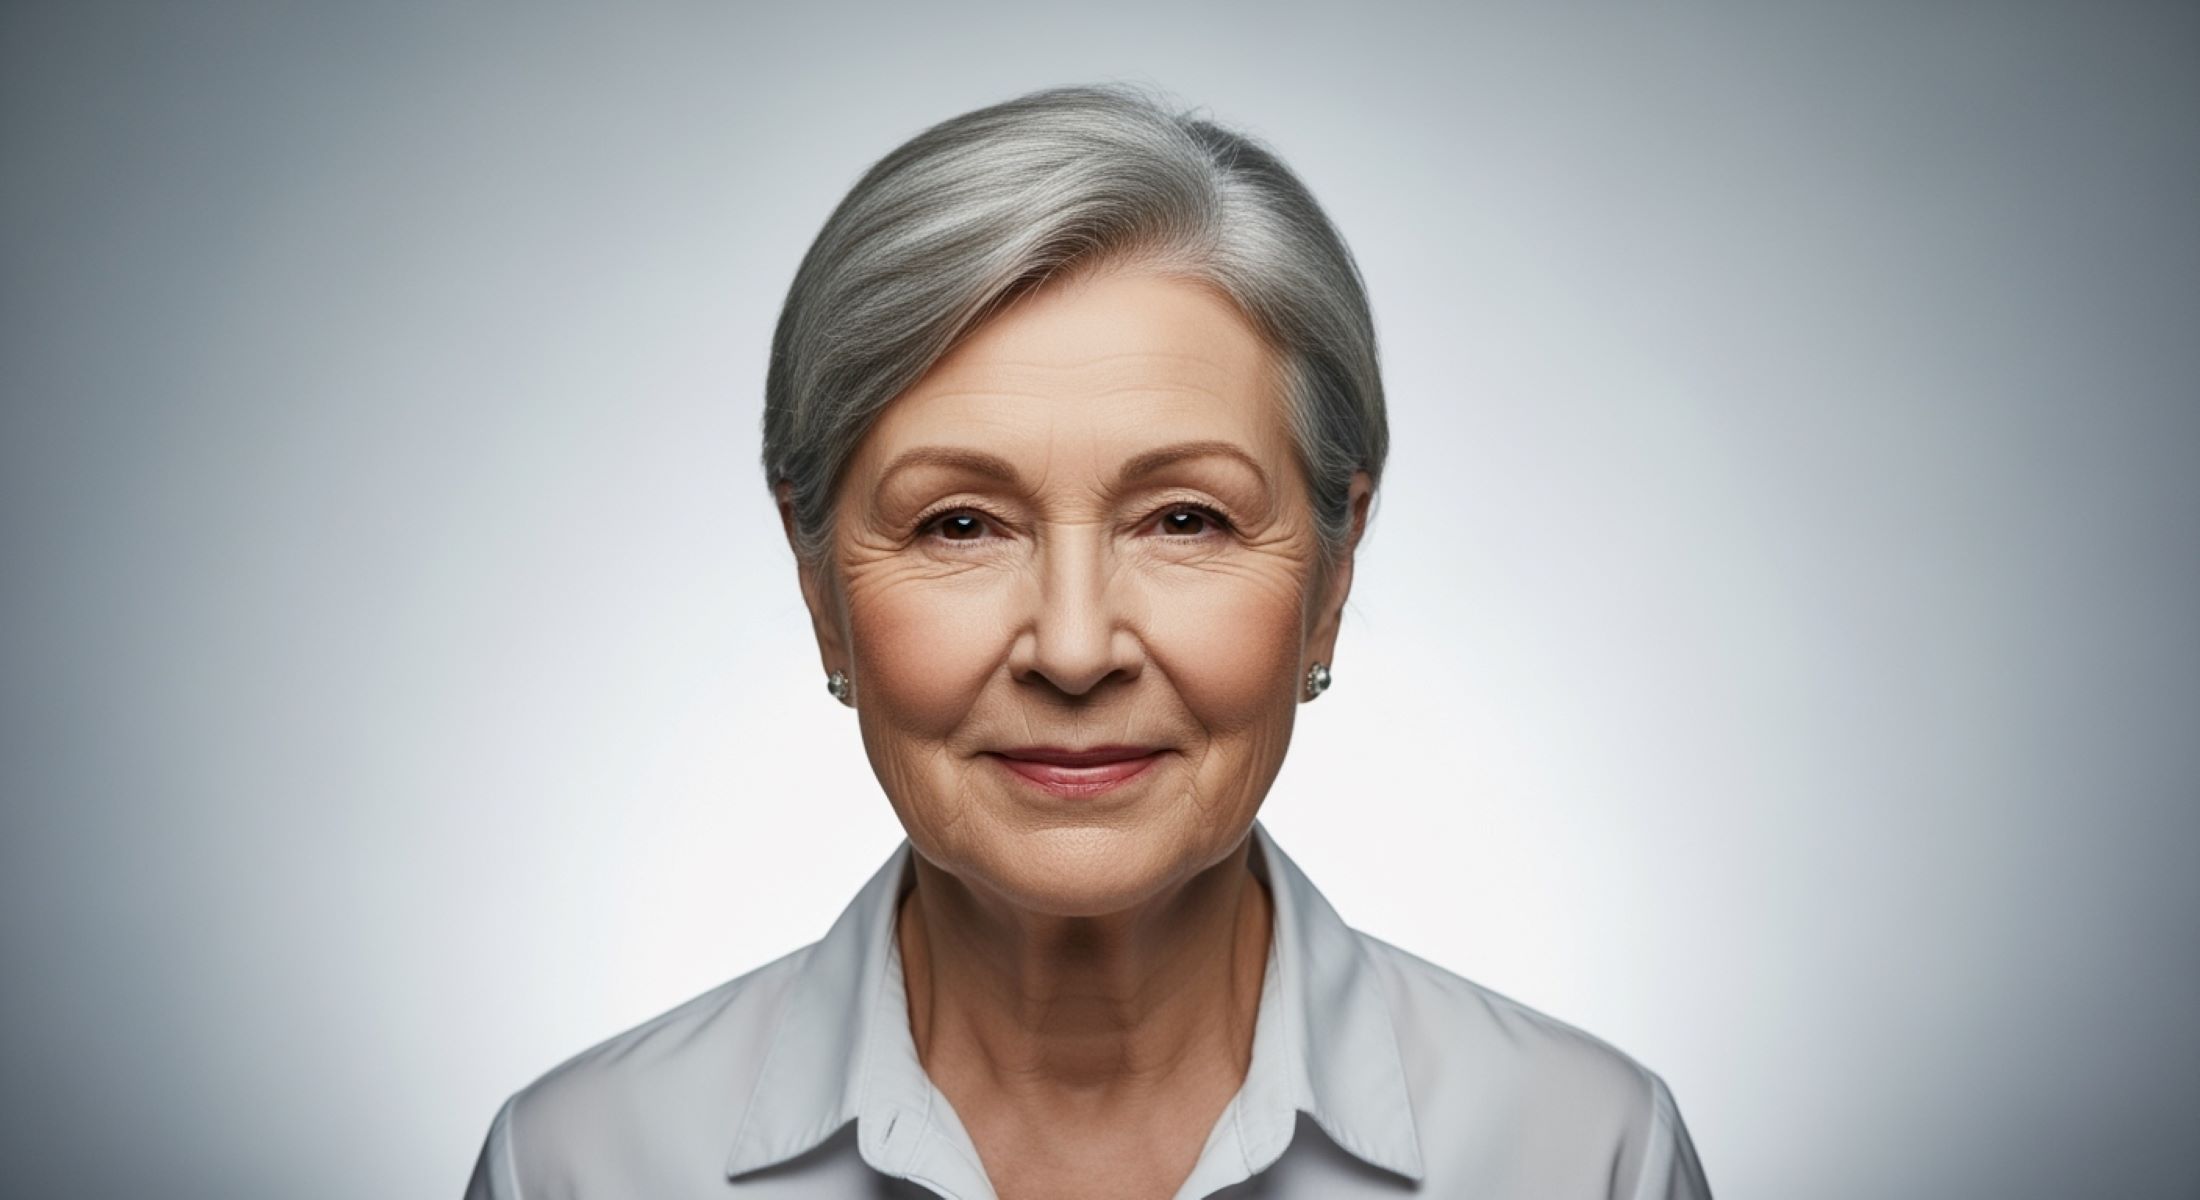
Before taking a passport photo for a senior, it’s essential to understand the strict guidelines set by passport authorities. These rules are in place to ensure that every photo accurately represents the individual, making identification straightforward. A single mistake, like an incorrect background color or improperly positioned head, can lead to the photo being rejected and cause delays in the passport application process. For seniors, following these regulations carefully is even more important because aging can subtly alter facial features, which must still be captured accurately according to official standards.
The most basic requirements for passport photos include size, background, head position, and visibility of facial features. Typically, the photo should measure 2×2 inches (51×51 mm), providing enough detail to identify the individual while maintaining a standard size accepted worldwide. The background must be plain and light-colored, usually white or off-white, to avoid distractions and ensure the face stands out clearly. The head should face the camera directly, and the expression must remain neutral, which means no smiles showing teeth or exaggerated facial expressions. The eyes must be fully open and clearly visible, free from obstruction by hair, hats, or glasses glare, to ensure a proper biometric reading if required.
Seniors often need special consideration due to changes in skin texture, wrinkles, and natural sagging of facial features that come with age. Uneven lighting or incorrect head positioning can exaggerate these features, creating harsh shadows that may obscure the face or make it difficult to recognize. Using proper lighting and positioning helps soften these shadows, ensuring that the photo captures a clear and natural representation of the senior. This careful attention ensures compliance with government standards while presenting the individual in a flattering and realistic way.
Finally, headgear and other accessories require careful attention. While hats or religious head coverings are generally allowed, the face must remain fully visible from the bottom of the chin to the top of the forehead. Seniors wearing glasses must ensure there is no glare that obscures the eyes, and frames should not cover any part of the eyes or eyebrows. By understanding and following these basic rules, seniors and their caregivers can avoid common pitfalls and ensure the passport photo is accepted the first time, making the entire application process smoother and less stressful.
Lighting Tips for Seniors’ Passport Photos
Lighting is one of the most critical factors when taking a passport photo for seniors. Proper lighting can soften fine lines, reduce shadows, and ensure that facial features are captured clearly and naturally. For seniors, who may have more pronounced wrinkles, sagging skin, or uneven skin tones, lighting becomes even more important to achieve a flattering and compliant photograph. Below is a detailed list of lighting tips to follow:
- Use soft, diffused lighting rather than harsh, direct light, which can exaggerate wrinkles and create deep shadows on the face.
- Opt for natural daylight whenever possible, as it produces a gentle and even illumination that complements senior skin tones.
- If natural light isn’t available, use softbox or umbrella lighting to evenly light the face and minimize harsh contrasts.
- Position the main light source at a 45-degree angle to the face rather than directly above or below, as this helps reduce shadows under the eyes and chin.
- Avoid overhead lighting entirely, as it tends to create unflattering shadows around the eyes, nose, and neck, emphasizing wrinkles and facial folds.
- Ensure that the background is evenly lit to prevent harsh contrasts between the subject and the backdrop, which can interfere with passport photo compliance.
- Use a secondary fill light or reflector to eliminate any shadows on the opposite side of the face, ensuring a balanced and natural appearance.
- Keep the light source at a moderate distance; too close can wash out facial features, while too far can create uneven illumination.
- Avoid colored or tinted lights, as they can alter skin tones and make the photo non-compliant.
- Make sure there are no reflections or glare, especially for seniors who wear glasses, as bright light can reflect off lenses and obscure the eyes.
- Consider the senior’s hair and facial contours when positioning lighting; adjusting angles slightly can help minimize shadows and highlight natural features.
- Use consistent lighting across multiple shots if taking several photos to ensure the final choice has uniform exposure and clarity.
- Avoid relying solely on room lighting or overhead fluorescent lights, as they often produce harsh, unflattering shadows and uneven color tones.
- Check the final photo on a screen or print a test version to ensure the face is evenly illuminated, with no part obscured by shadows or highlights.
- Keep lighting simple but effective; the goal is to enhance clarity, not create dramatic effects, to meet official passport photo standards.
Choosing the Right Expression
| Aspect | Practical Tips | Common Mistakes | Benefits | Reminders |
| Neutral Expression | Keep lips closed and relaxed; maintain a calm, composed look | Smiling too widely, frowning, or pursing lips | Ensures passport photo compliance and accurate identification | Neutral doesn’t mean expressionless; aim for subtle warmth |
| Eye Appearance | Slightly raise eyebrows to open eyes naturally | Droopy eyelids or squinting due to tension | Eyes appear alert, friendly, and clearly visible | Avoid raising eyebrows too much—keep it natural |
| Soft Smile | Think of a “soft smile” with minimal lip movement | Over-exaggerated smile breaking the neutral requirement | Adds warmth without violating rules | A subtle smile can make seniors appear more approachable |
| Relaxed Jaw & Neck | Take a deep breath, loosen jaw and neck muscles | Stiff neck, clenched jaw, or visible tension | Reduces harsh lines and unnatural shadows on the face | Relaxation helps seniors feel comfortable, producing better results |
| Facial Symmetry | Keep head straight, face the camera directly | Tilting head or uneven facial expressions | Maintains photo symmetry and improves visual clarity | Symmetry is essential for passport standards; practice in front of a mirror |
Posture and Head Position
How a senior positions their head and shoulders can make a significant difference in the quality and compliance of a passport photo. Proper posture ensures the face is captured clearly and reduces the appearance of shadows or distortion. Seniors often experience subtle changes in posture with age, such as a slight forward tilt or rounded shoulders, which can unintentionally affect the symmetry and overall impression of the photo. Paying attention to these details helps create a natural, balanced appearance that meets official passport requirements.
Sitting or standing tall is one of the most important steps. Shoulders should be relaxed but straight, avoiding any slouching that can make the neck appear shorter or create unwanted shadows. The chin should be aligned parallel to the camera, neither tilted up nor down, to ensure the entire face is visible. This positioning helps distribute light evenly across the face, reduces shadows under the chin, and highlights natural facial features without exaggerating wrinkles or folds.
Facing the camera directly is equally crucial. Even a slight turn of the head can distort the photograph and potentially lead to rejection by passport authorities. It’s important for seniors to make sure both ears and the hairline are visible, as these details contribute to an accurate representation. A centered, forward-facing position ensures that the photo captures the full facial structure, which is vital for identification and compliance with biometric standards.
Finally, combining good posture with a relaxed expression enhances the overall quality of the passport photo. Encouraging seniors to take a deep breath and release any tension in the shoulders and neck can help them maintain a natural and confident stance. This approach minimizes the appearance of fatigue or stiffness, producing a polished, official-looking photograph that is both flattering and fully compliant with passport regulations.
Hair and Makeup Tips for Seniors
Even though passport photos have strict rules against dramatic makeup or accessories, subtle grooming can make a noticeable difference in how a senior appears on the final photo. Proper attention to hair and makeup not only ensures compliance but also enhances clarity and natural appearance. Below is a detailed list of hair and makeup tips specifically for seniors:
- Keep hair neat, clean, and away from the face to ensure all facial features are clearly visible.
- Avoid hairstyles that cover the eyes, eyebrows, or part of the forehead, as these can interfere with identification requirements.
- For seniors with thinning hair, gentle styling techniques such as soft waves or light backcombing can create volume without casting shadows.
- Tame stray hairs using a lightweight hairspray or gel, avoiding shiny products that reflect light in the photograph.
- Choose hairstyles that frame the face naturally, softening the overall appearance while maintaining clarity for passport standards.
- Use a light foundation or tinted moisturizer to even out skin tone, being careful not to over-apply or create a shiny surface.
- Avoid heavy powders or glitter, as they can produce glare under lighting conditions used for passport photos.
- Opt for neutral or soft lipstick shades to define the lips subtly without appearing overly dramatic.
- Keep makeup minimal around the eyes; avoid dark eyeliner or mascara that could create shadows or distort the natural eye shape.
- Ensure that any makeup used does not alter the natural skin tone significantly, maintaining a realistic representation of the senior’s appearance.
- Check the face under the same lighting that will be used for the photo to ensure even coverage and natural highlights.
- Use skincare products sparingly to prevent oily patches or shine that may appear under camera flash.
- Avoid accessories such as large hair clips, pins, or jewelry that could obstruct facial features or violate passport photo rules.
- Encourage a natural look that enhances the senior’s features without masking their true appearance.
- Perform a final visual check before taking the photo to make sure hair and makeup do not interfere with any official passport requirements.
Glasses and Accessories
| Aspect | Practical Tips | Common Mistakes | Benefits | Reminders |
| Glasses Use | Glasses are allowed if glare is completely avoided | Wearing glasses with glare or heavy reflections | Ensures eyes are visible and photo meets official standards | Adjust light sources or remove glasses temporarily |
| Lens Type | Avoid tinted, colored, or transition lenses | Tinted lenses obscuring eyes | Clear lenses ensure eyes are fully visible | Prescription lenses are fine if glare-free |
| Frame Placement | Ensure frames do not cover eyes, eyebrows, or part of the face | Thick frames or oversized glasses covering eye area | Maintains full facial visibility for identification | Frames should sit naturally on the nose |
| Alternative Options | Remove glasses for the photo if glare cannot be avoided | Ignoring reflection problems | Provides a clear, compliant image quickly | Only remove if vision or comfort allows temporarily |
| Lighting Adjustment | Position light to minimize reflection on lenses | Direct lighting causing bright spots or shadows on glasses | Improves clarity of eyes and overall photo | Check preview before final shot to ensure compliance |
Camera Settings for Senior Passport Photos
When taking a passport photo at home for a senior, having the right camera settings can significantly improve the final result. A high-resolution camera ensures that all facial features are captured clearly, which is crucial for official identification purposes. Modern smartphone cameras are often sufficient if used correctly, but it’s important to stabilize the camera using a tripod or a flat, steady surface. This prevents blurring caused by hand movements and maintains sharpness, which is particularly important when capturing the subtle details of a senior’s face.
Focusing on the face, especially the eyes, is essential. The camera should lock focus on the eyes to ensure they are crisp and well-defined, as the eyes are a primary reference point for biometric identification. Filters or software enhancements should be avoided, as they can alter skin tone, texture, or facial features, potentially causing the photo to be rejected. A natural, unaltered representation of the senior is always preferred for compliance with passport standards.
Distance and framing also play a critical role in producing a compliant passport photo. The camera should be positioned at eye level with the senior, ensuring that the head is neither tilted up nor down. The face should occupy approximately 70–80% of the frame, with enough space around the head to include the top of the hair and the shoulders. Proper framing guarantees that all required features, such as ears, hairline, and chin, are visible while maintaining proportional balance in the photo.
Finally, consistent lighting and positioning work hand-in-hand with camera settings to create a polished, official-looking photo. Seniors should be seated or standing comfortably, with relaxed shoulders and a neutral expression, while the camera settings ensure clarity and detail. Taking multiple shots and reviewing them on a screen before printing or submission allows for adjustments in focus, angle, or distance, minimizing the likelihood of rejection and ensuring the final photo meets all government requirements.